 I was the owner of a metallic black 1995 VW Corrado VR6. Here you’ll find notes about my experiences with it: what broke, how I fixed it, how much it cost, what mileage I get, how fast it goes (on private road of course) etc.etc. I hope it’s useful to somebody out there on the Interweb.
I am in no way well experienced in the ways of petrol engines, or automobiles in general, so the information here may be a little patchy, or even downright wrong. I’m learning small chunks here and there, and documenting what I can. If you spot something wrong, or just have any comments, e-mail me.
Sold
June 2005: I’ve sold my Corrado now, to my Brother. It’s still on my road but it’ll be moving to his drive soon. He’ll be driving it while he sorts a few things out on his other Corrado (another VR6). When he’s done he’ll be selling one of them, so watch this space!
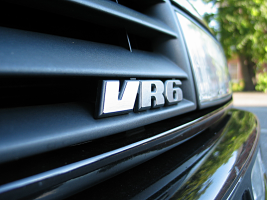
Hardware Details
2861cc displacement, 6-cylinders in a 15 degrees V, 5-speed manual, front wheel drive, ABS, 2 valves per cylinder, 190bhp (140kW) at 5800 rpm, 181lb ft (245Nm) at 4200 rpm, 66bhp/litre. Read more
My own car is standard except the alarm, the stereo and the suspension, which seems to have been lowered about 35mm (before I purchased it).
Change Log
I’ve been keeping a kind of diary of running my Corrado for a while now. I’ll start elaborating further on this page from now on too.
Immobilizer
My Corrado came factory fitted with an immobilizer. It’s enabled using an square black inductor keyfob, with an LED indicator next to the ignition point.
I’d been experiencing random starting problems and everybody was pointing at the immobilizer, but I wasn’t convinced. The reason being that I each time the problem occurred it seemed to be rectified with a top up of oil. This made me suspect the hydraulic tappits not functioning correctly without enough oil.
Well, eventually the car stopped and wouldn’t start at all. The local VW garage found a fault with the immobilizer coil, which was replaced for around £120 parts and labour. All starting problems have now ceased.
The problems I had with my car being broken into whilst at the VW dealers are a different story (Coming Soon).
Coil Pack
The coil pack does what the distributor did on older ignition systems, it supplies the spark to the spark plugs at the right time and in the right order. Rather than a rotating arm touching electric contacts, it works electronically. Rather more high brow.
Apparently, electronic failures with coil packs are rare. You’re far more likely to run into a mechanical fault, such as burnt terminals or damaged connectors. Some people thinks all pre-1998 VR6 coil packs just suck. A £300 repair job every 30,000 miles.
If it’s cracked, water gets in it and grounds the spark to the engine block, causing mis-fires. You can find details of the process of using epoxy resin to fix the cracks here. It works out marginally cheaper than replacement (£2 vs £300).
My problem
In my case, the engine idles fine, but suffers jerkyness and loss of power up to 3000rpm during acceleration. The coil pack was finger-pointed as a possible culprit, but I’m going to check out the spark plugs first. It’s far more likely they are coked up or something (at least I hope).
Some Audi S4 specific information regarding the ignition system.
Update: The guys at my garage took a look into this whilst it was being serviced. They found nothing wrong with the coil pack, but found 3 duff HT leads. A full replacement set cost £60 if I remember correctly.
Whilst this improved the situation, I now feel there is a loss of power before 2000rpm. After further discussion with the garage, they suggested I take it to an official VW stealers to have all the sensors checked. I’ve not done this yet but plan on doing soon. It’s going to cost me around £ 65, just to get it plugged in to their computer, bleh. Should invest in my own cable and software.
Ventilation system
My airflow system hasn’t worked correctly since I brute force turned the direction adjuster and snapped something. With the recent heat waves (May 2003) this became a priority as my air-conditioned air was being wasted. I took it all to pieces to figure out what was going on.
How it works
The direction dial adjusts where the air comes out from (e.g:the footwell or the windscreen vents) by adjusting two flaps. Two little arms moved by the dial operate two cables that are connected to the flaps. Taking off all the knobs and facure, unscrewing four screws and pulling the dial control box forward reveals the magic behind, including the cables. The top cable controls the footwell/windscreen flap and the bottom cable controls the flow to the dashboard vents.
In my case, the dashboard vent flap had jumped a cog restricting the movement of the cable, which in turn had restricted the movement of the dial, until I turned it too hard and broke a little bit of plastic. Luckily, once I’d fixed the movement of the cable, this missing plastic (from a track in one of the cogs in the dial that controlled the movement of the cable arm) wasn’t necessary.
The cables controlled by the dial lead further down and back behind the centre console where the air flow is controlled. The flaps are inside a moulded plastic casing and are difficult to reach. The dash vent flap is control by three cogs. One directly connected to the flap axis, one which I assume is just a gear, and another which has an arm to which the cable is connected. Here a cog had jumped, restricting the movement of the cable. I popped out the gear cog, adjusted the flap and cable to fully closed and replaced it (this was tricky).
I then reseated the arm at the other end of the cable (the dial end) into the spiral track in the cog. This cog is controlled by the dial cog seated at 90 degrees to it. You can remove the dial cog by pushing in all the tags and removing the centre part, which is the front “handle” for the dial.
It’s still a bit still to operate, but it works now.
The fan control
My fan control didn’t work when set to level 2 or 4. The dial on this just controls a copper arm with a twisted copper end. The end connects two tracks together as the arm turns. After dismantling this I found the end was bent and the end didn’t connect the two (upper and lower) tracks at certain settings. I removed the arm, cleaned and re-twisted it, and now it works fine.
Leave a Reply